Smart Project - Creating Scalable Smart Service (.NET)
This article describes how to create your own Remoting Smart Service™ using Remoting .Net edition, capable of serving your business logic via the standard mechanisms of SOAP over HTTP, while also exposing your service in a variety of other ways, including Remoting’ highly efficient BIN message format.
See article Smart Project - Creating Scalable Smart Service (Delphi) for the Delphi edition.
Consuming your Smart Service™ in Microsoft C
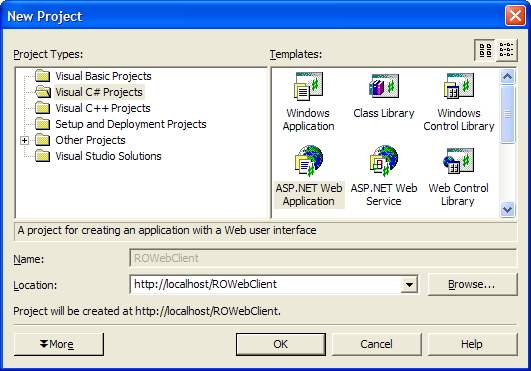
After the Visual Studio IDE is loaded, click File -> New -> Blank Solution. Select the Visual C# Projects folder and the ASP. NET Web Application item. Fill out the dialog as shown below:
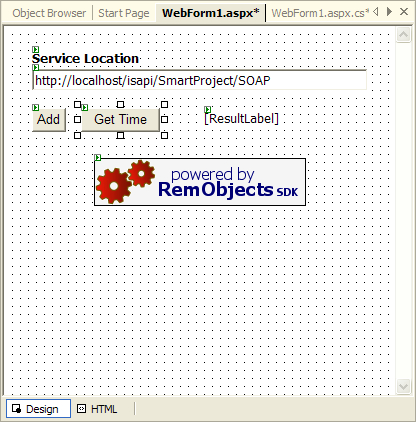
Click the OK button. Design a form similar to the one below, with a TextBox, two Buttons, and an output label:
Right click on the References folder in the Solution Explorer window and click Add Web Reference. Fill in the SOAP URL for your Smart Service and click the Go button.

Click the Add Reference button. Add the following event handlers to your two Buttons:
private void Button1_Click( object sender, System.EventArgs e)
 {
       localhost.SmartServiceService SmartSrvc;
       SmartSrvc = new localhost.SmartServiceService();
       ResultLabel.Text = "1 + 2 = " + SmartSrvc.Sum(1, 2).ToString();
 }
private void Button2_Click( object sender, System.EventArgs e)
 {
       localhost.SmartServiceService SmartSrvc;
       DateTime ServTime ;
       SmartSrvc = new localhost.SmartServiceService();
       ServTime = SmartSrvc.GetServerTime();
       ResultLabel.Text = ServTime.ToString();
 }
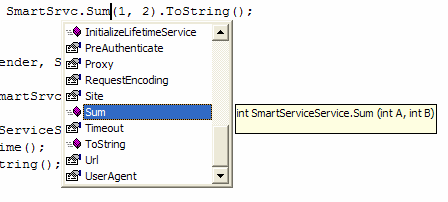
Notice that the imported WSDL information allows for code completion within the Visual Studio .NET IDE:
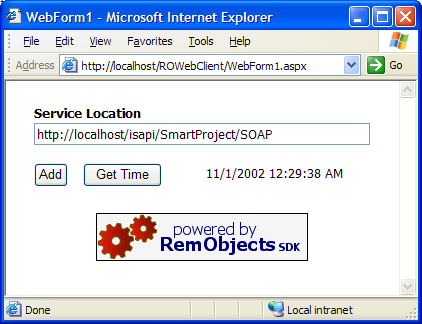
Now we are ready to test our C# web application. Click the Run toolbar button within the VS .NET IDE.